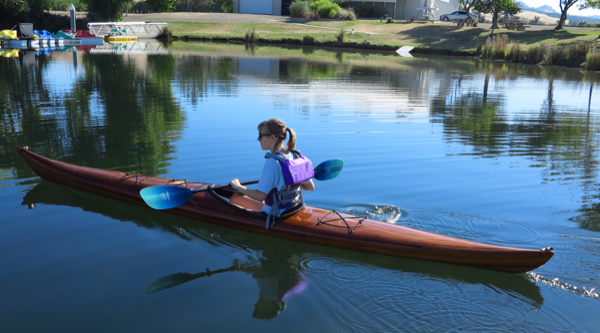
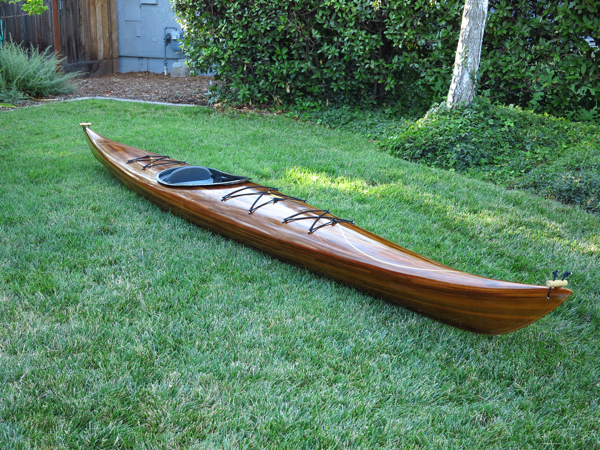
This kayak is a One Ocean Kayaks "Storm LT", and it's been named "Lily" for reasons which may be obvious if you you read enough of this page.
Things go much more quickly when one knows what one is doing... Every step of this boat build has taken 30-50% less time than the equivalent on the first kayak. I also took fewer pictures in general. I'll take more pictures on the 'different' parts, though.
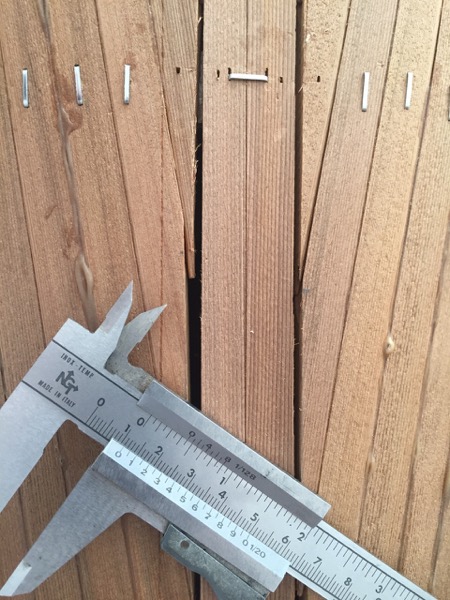
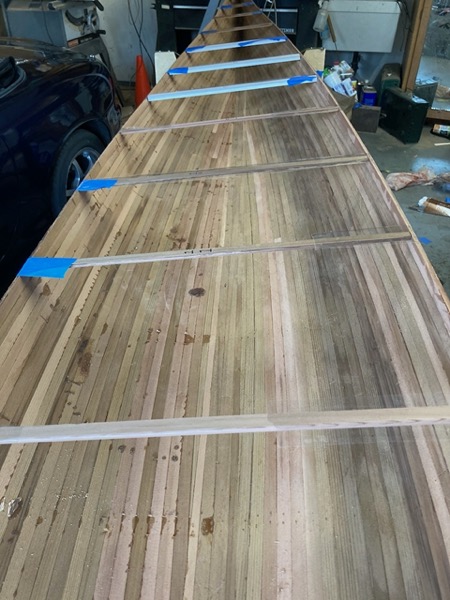
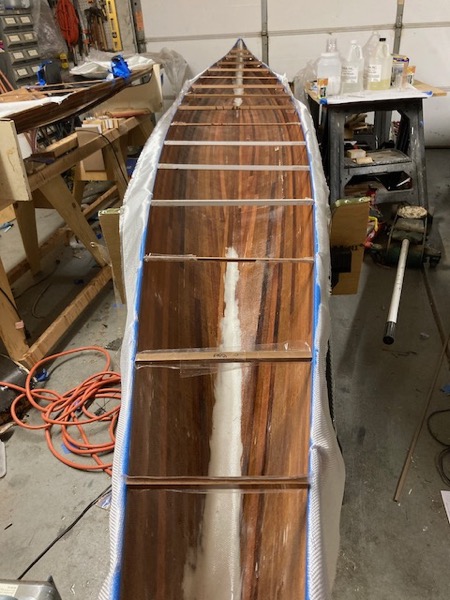
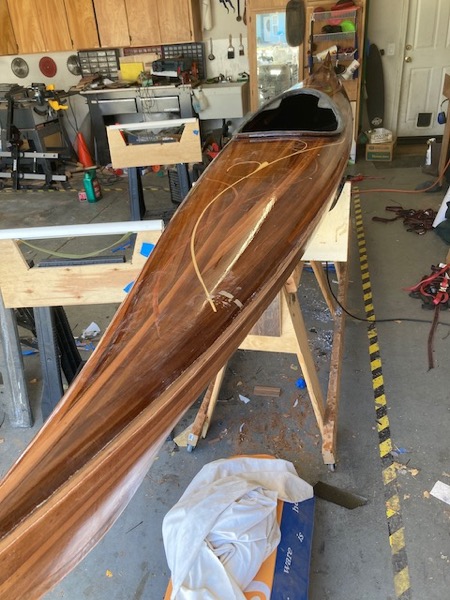
I used a different method for filling to the keel. Instead of trimming every strip exactly to fit, I put two keel strips down the center and then put the edges of all the rest of the strips close to those. (Up to about 5mm gap!) This allowed me to fill the hull strips very quickly. Once the hull was filled, I then carefully cut a line 7/16" from the edges of the keel strips, on each side, and dropped in a 7/16" strip in the slot. Voila! Everything cut and fitted with minimal effort.
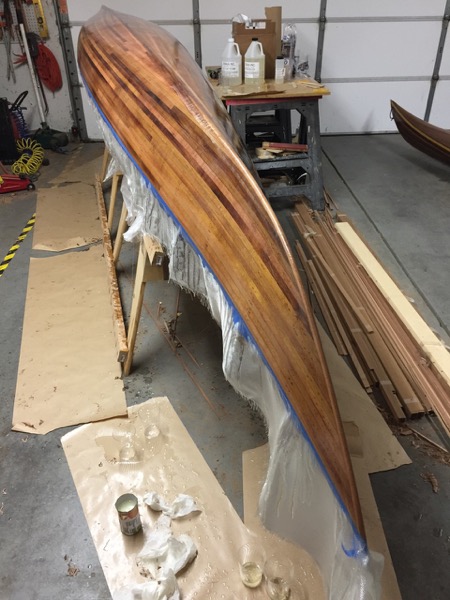
Here it's ready to fiberglass.
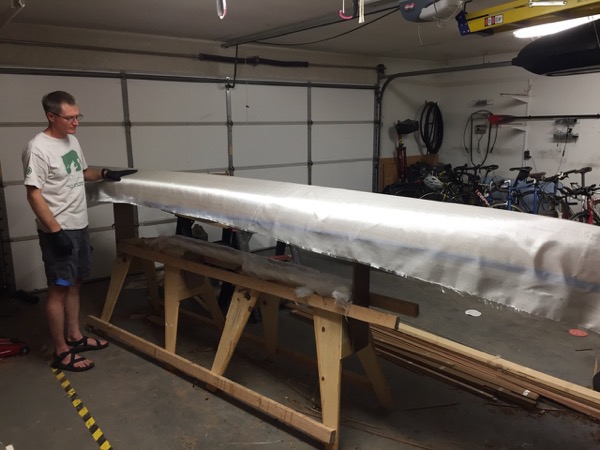
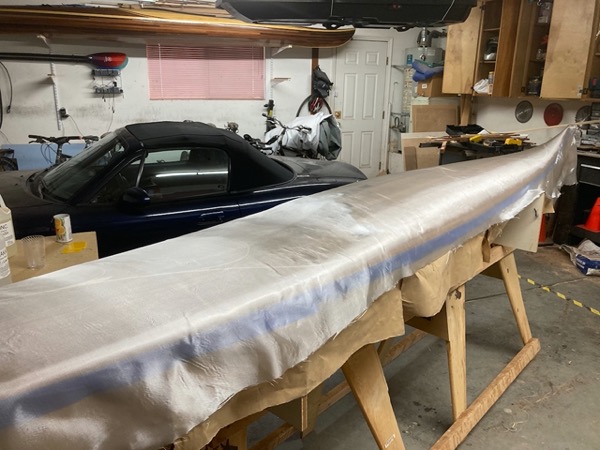
Applying the resin was tricky. The first kayak, I was doing this in cold weather and I actually had to set up two space heaters in the garage just to ensure that the resin would cure at all. Wait time between resin coats was about 5 hours. This time I'm working in June and it's around 100 degrees F in the garage. I had to apply the resin in 4-oz batches, with Jessalyn mixing them as I applied them, and could re-coat in 90 minutes. So it went faster, but was very stressful. I'm glad this was not my first fiberglassing job! The previous experience also helped in that this fiberglass job is much more smooth and even than on the first kayak.
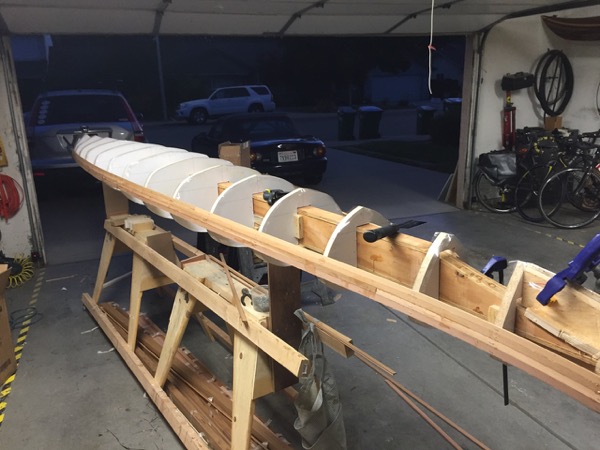
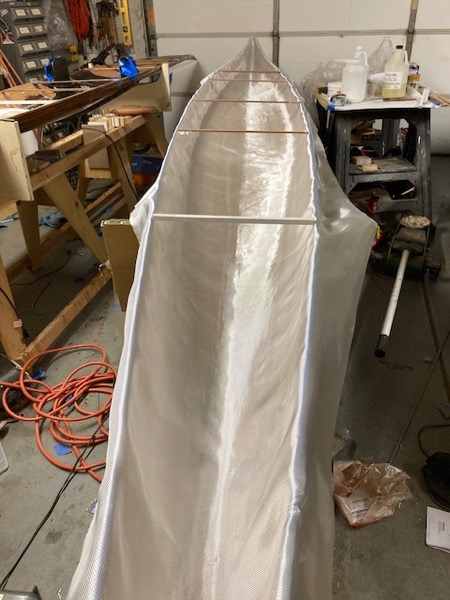
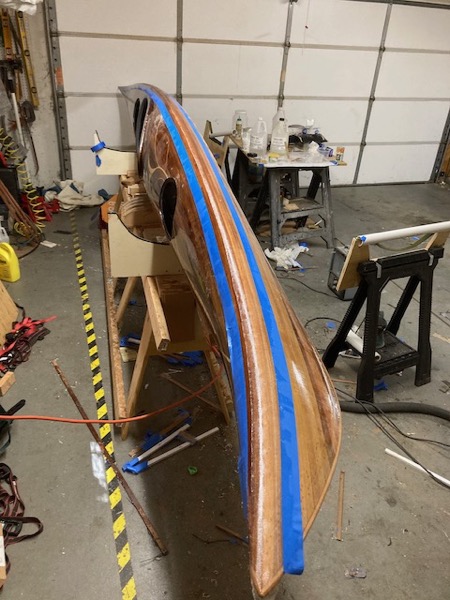
Here it is with 6-oz hull fiberglass, 4-oz abrasion patch, extra 6-oz fiberglass tape on the bow and stern, and three additional thin coats to fill the weave. Time to turn it over and build the deck!
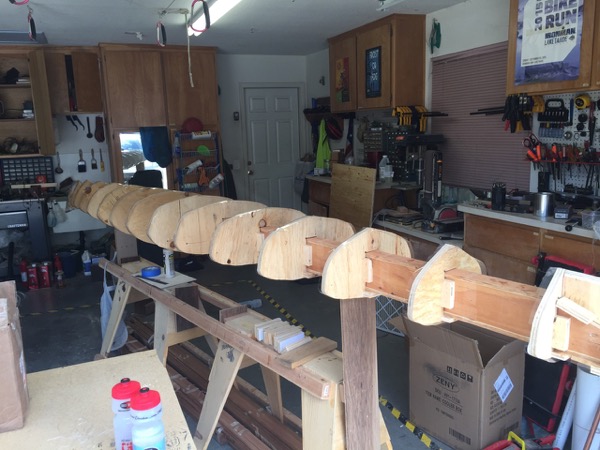
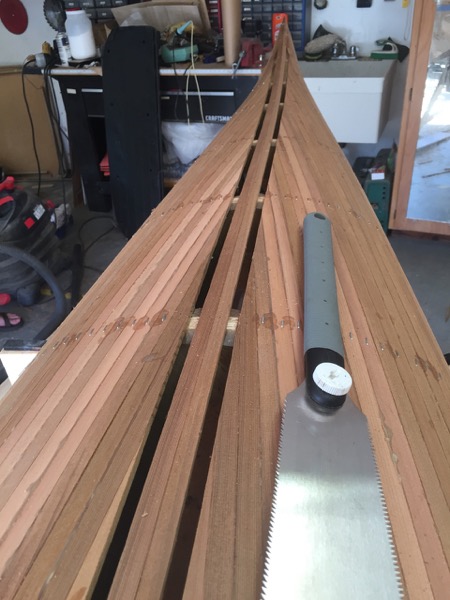
I used the same "center-strip and rough-in" technique for the deck as for the hull. Nine hours to rough this in, as opposed to 60 hours for kayak 1.
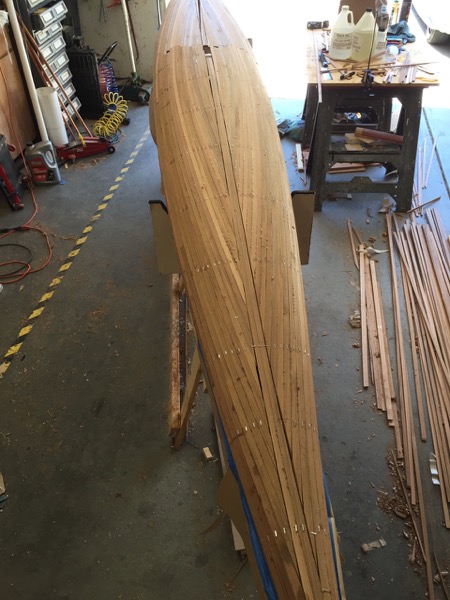
The center gap of the deck is very rough at this point. I didn't pay much attention to the gap other than to ensure it was less than a quarter-inch.
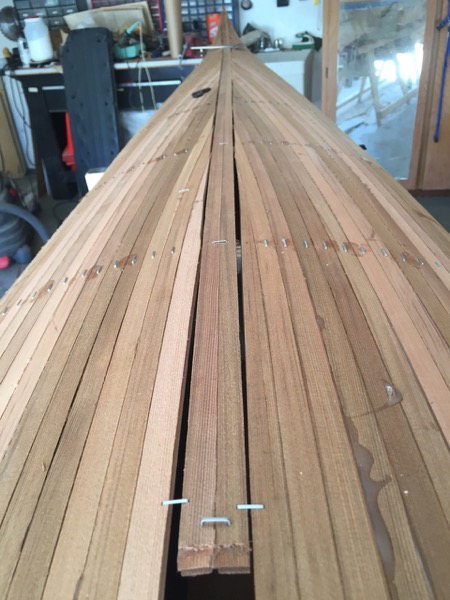
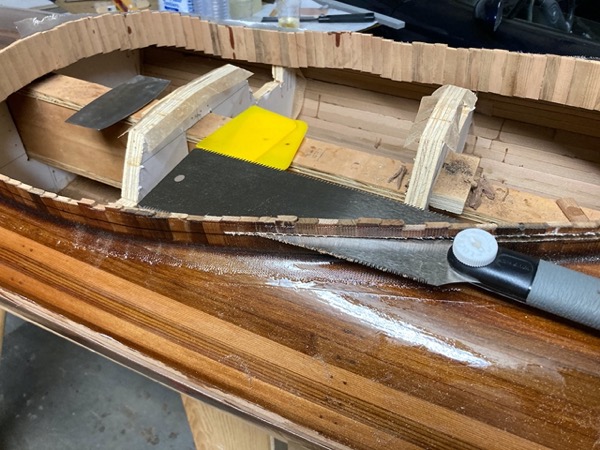
Now I score lines 7/16" from the edges of the center strips, and use a razor saw to cut inside the lines.
This takes a bit less than an hour, which seems like a lot but I only had to do it once.
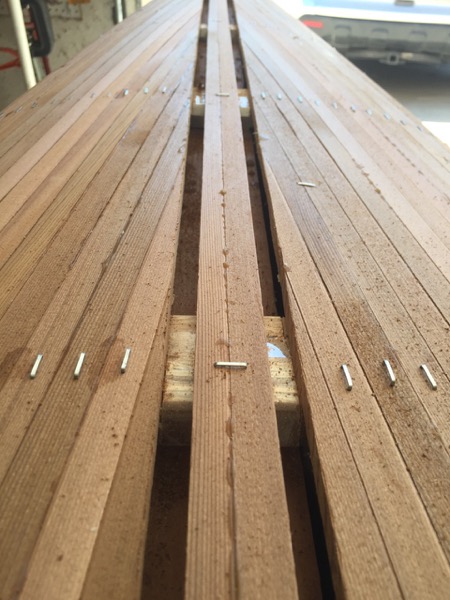
Using the more obvious "fit each piece" method I'd have had to spend about 10 minutes per strip to get the ends cut and trimmed for a tight fit, so this method was a great timesaver. Looks nice, too!
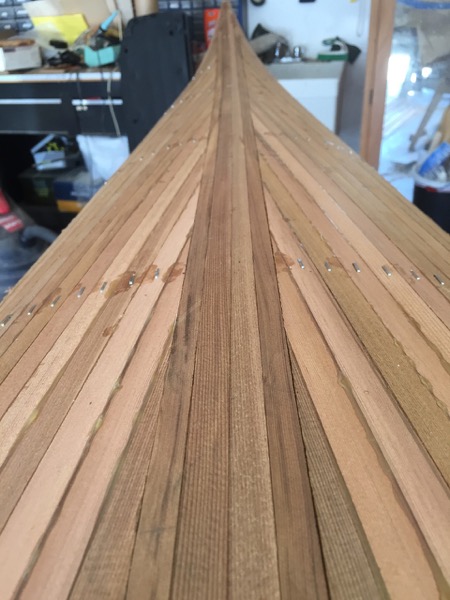
At this point I have a working deck... I could sand it and start fiberglassing it... I could probably finish the kayak in another 3 weeks.
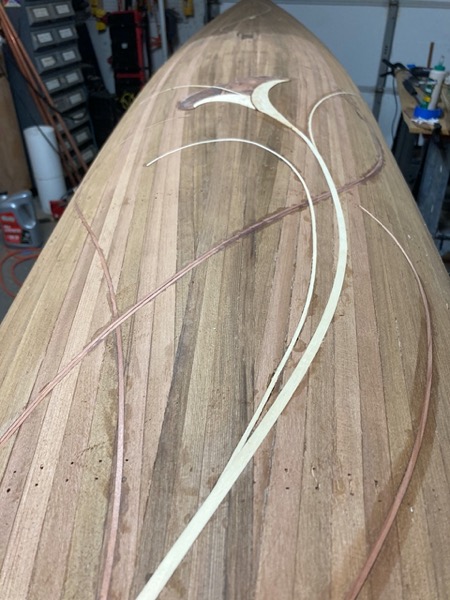
OR I could waste a lot of time inlaying a pretty design into the deck. If you've seen the first kayak, you don't really need to ask. Instead of building the deck with the pattern intrinsic to the structure, I'll be routing out and placing thin inlay pieces. Once again, I have no idea what I'm doing, so it should be fun!
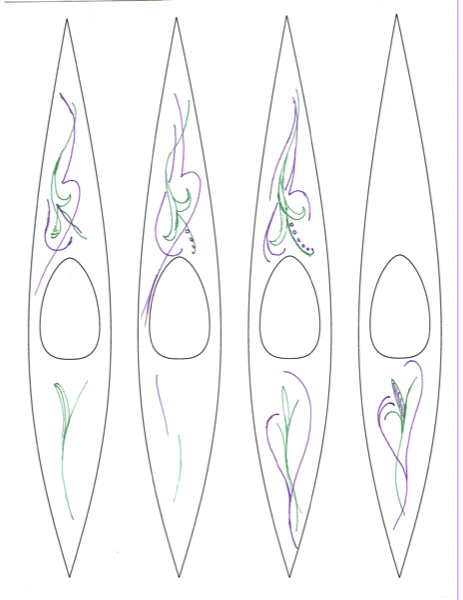
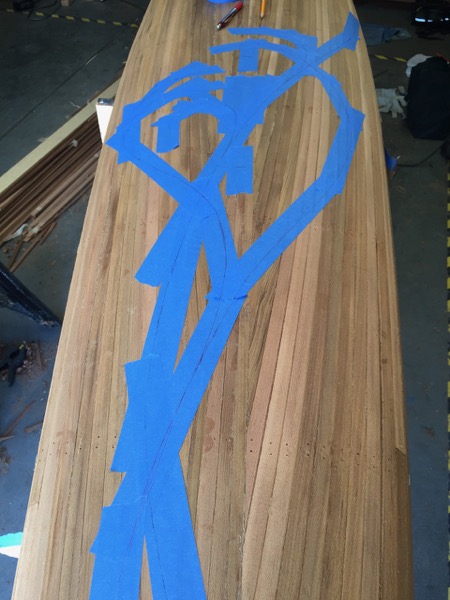
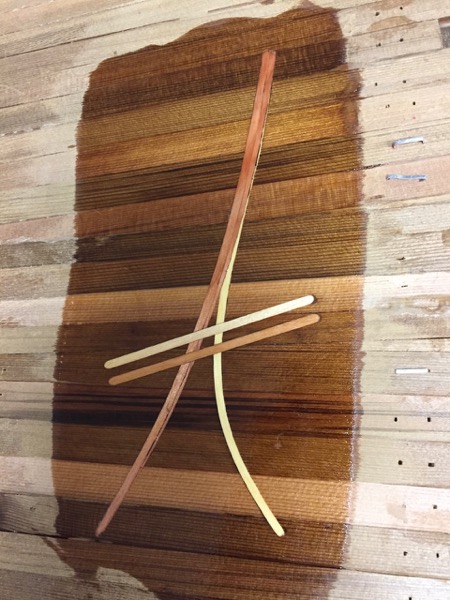
I sketched dozens of pages of design ideas on this blank page of kayak outlines. Been doing this for months, even before I started the second kayak. I have zero art training: I know what I want but I don't know how to get it. This page finally gets close to what I'm imagining.
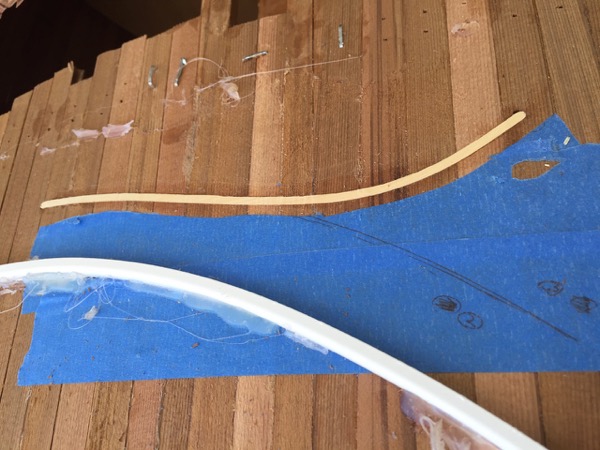
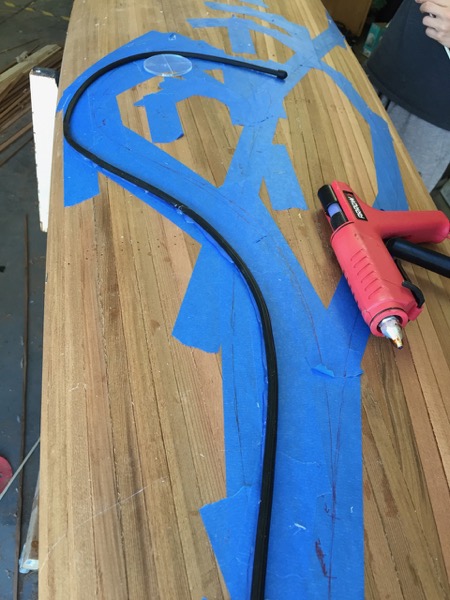
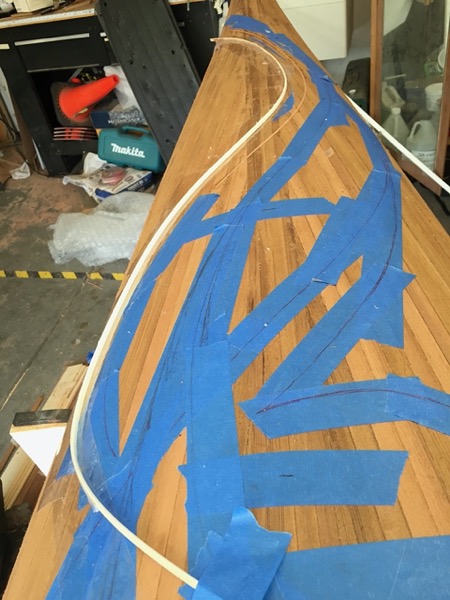
In order to do the inlay, I have to be able to produce smoothly curved cuts about 2mm deep on the deck. The cuts have to have clean sharp edges. Free-handing with a router does not work for this. What I need is a flexible strip of material that I can then attach to the deck so that it provides a guide edge to the base of the router. After a lot of trial and error, I found some pvc-coated MDF moulding that cuts down to a flexible width and still sticks well to hot-melt glue. I applied first tape, then glued down the guide strip, then cut with the router.
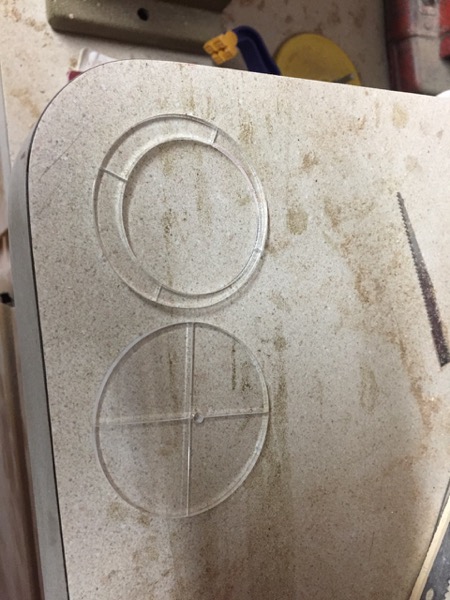
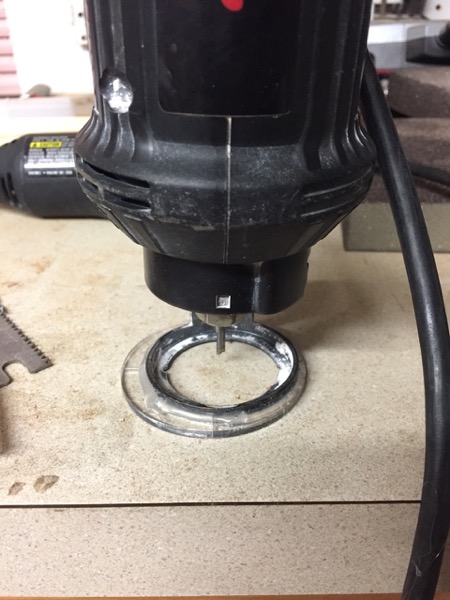
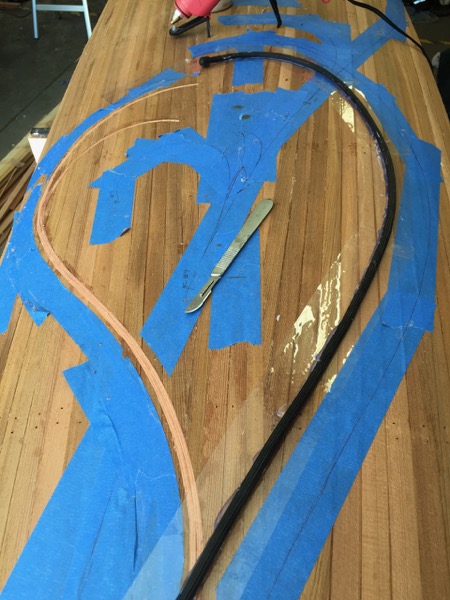
This works. But I want to be able to put in tapers, etc, and aligning the guide strips takes more time than cutting the groove and placing the inlay strip. It's hard to get the guide strip in exactly the right place for this. The solution I came up with was to make an offset ring for the router base. I can then controllably change the distance from the guide strip to the cut by rotating the router as I move along the cut. I also made a "dummy router": a clear circle with offset center hole. I can use this circle to align the guide strip with the desired cut line. I can also rotate it to see exactly where the router would be cutting with the same base rotation. These are laser-cut from 1/8" acrylic, with low-power partial cuts to show where the offset is a multiple of 1/8".
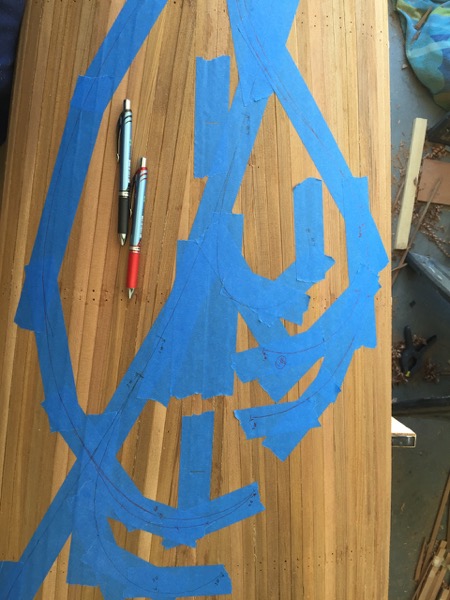
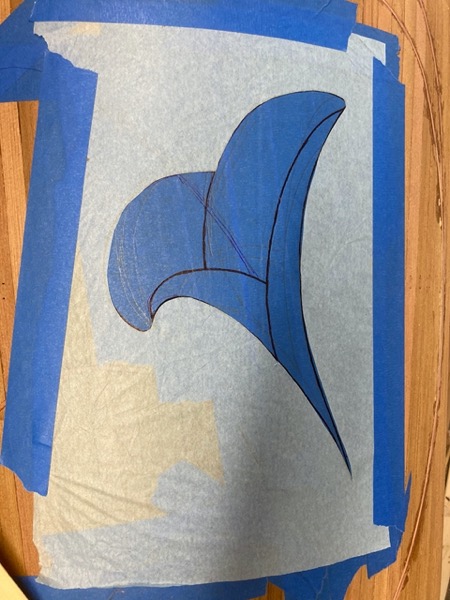
I spent an interesting couple of hours laying out the design on tape, making sure it was balanced. It's not a symmetric design, so it's not immediately obvious if it's not exactly centered; the goal was to get the 'weight' of the design centered.
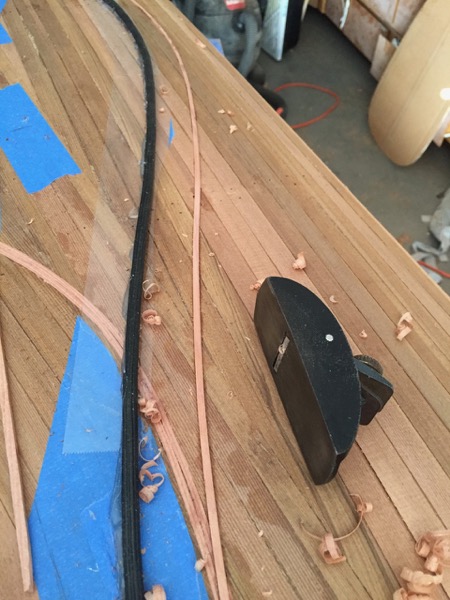
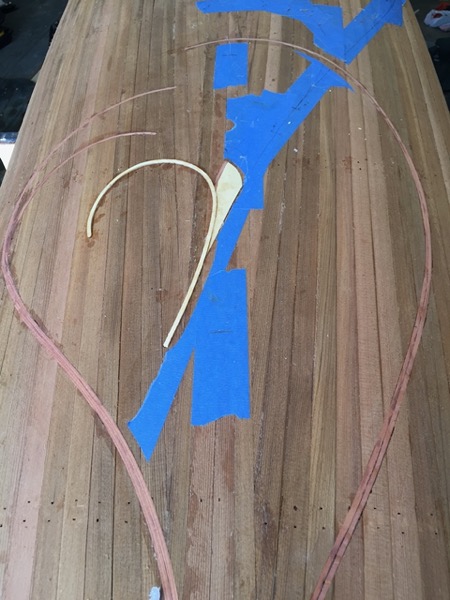
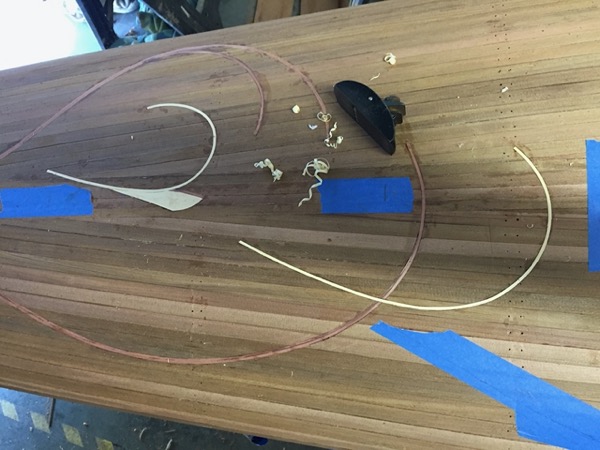
The offset router base works quite well! Here I've cut a second 1/8" slot overlapping an initial 1/8" inlay so that the final result will be a tapered 1/4"-1/8" curve. I did not have to move the guide strip, I just rotated the router base as I made the second cut.
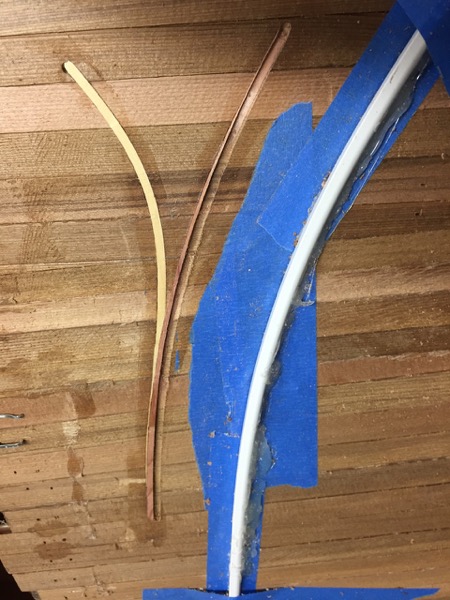
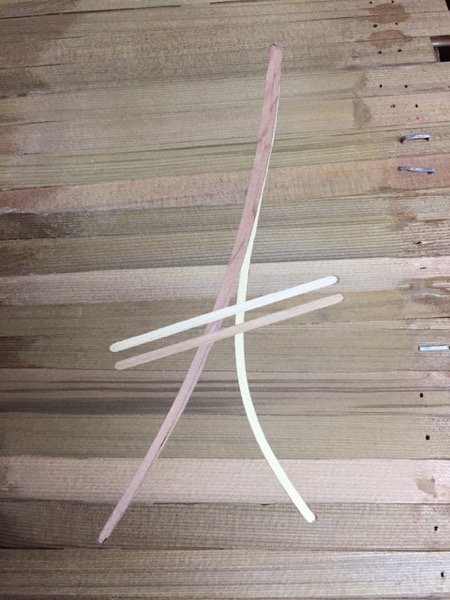
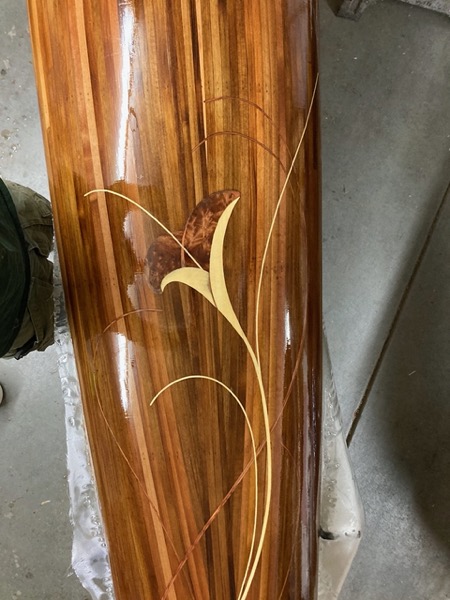
This entire 'doodle' is on a section of the deck that will be removed when I cut out the cockpit. I've tested it with four types of wood, just to see which will give the best results and contrast nicely with the red cedar deck. Redwood, Yellow Cedar, Cherry, Maple. The cherry is problematic: it's rather brittle. Also the cherry and maple are significantly harder than the cedar deck, which makes sanding it smoothly more difficult. I'm hoping that the redwood will show nicely. For these redwood strips I've placed them with the tangent-cut face showing. The radial-cut edge may be a better choice as it would probably show up darker, and the lines between the strips would be lost in the grain lines.
Here it is with some epoxy on it to estimate what the final colors will be. Redwood and yellow cedar will be fine.
Now for the actual inlay! The MDF/PVC moulding strip I used for tests isn't able to manage the curvature needed for the design. I found some long 'twisty-ties' at the hardware store; rubber-coated flexy wire about a quarter-inch in diameter and 4 feet long. These make a decent curved guide for the router.
Once the slot is cut by the 1/8" router bit, I glue in the inlay strip and then plane it down to deck height before moving to the next strip. It's slow going, but will definitely be unique and possibly pretty when done. The order of cuts takes some careful consideration for multi-strip lines and tapers.
The redwood is an "interesting challenge". It's quite brittle and doesn't want to go around tight curves even when steamed. It seems to curve easier around a radial axis than around a tangental axis (flat-grain up rather than edge-grain up) but even then it's a challenge. The yellow cedar, on the other hand, I can curl in a 6-inch-diameter circle with a single steam session.

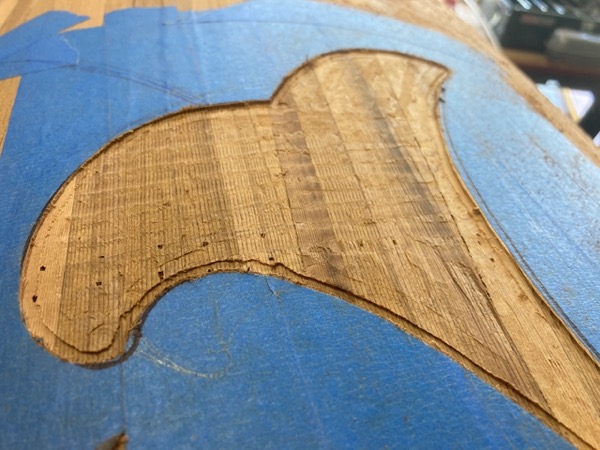
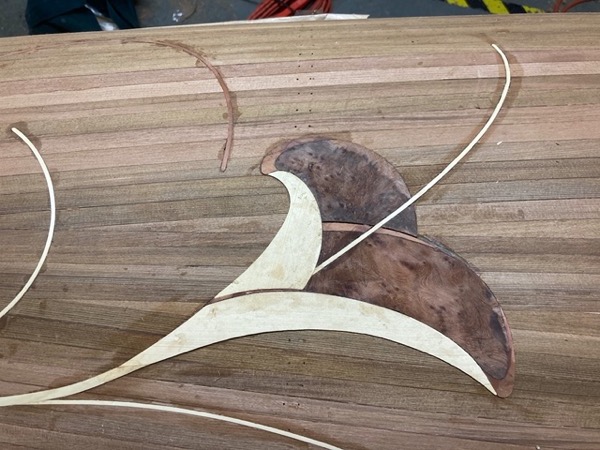
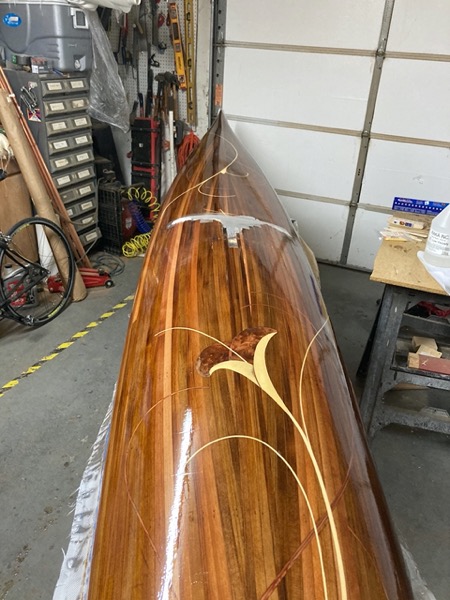
I'm getting pretty deep into "things I don't know how to do" here but I'm having fun with it. For the foredeck I'm doing a similar twisty-vine motif, but instead of a bud I'm putting in a bloom. I found a lovely bit of redwood burl when on vacation in Ft. Bragg earlier this summer, and I've sliced it up into 2mm thick bits, along with a plank of yellow cedar, to do marquetry.
I sketched the flower on tape on the deck until I had something I liked, and traced it on tissue paper. Then I cut the individual pieces of tissue out with a stencil knife and spray-glued them to the wood.
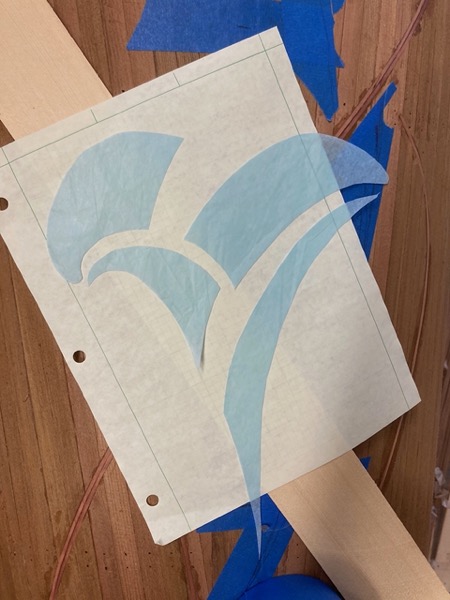
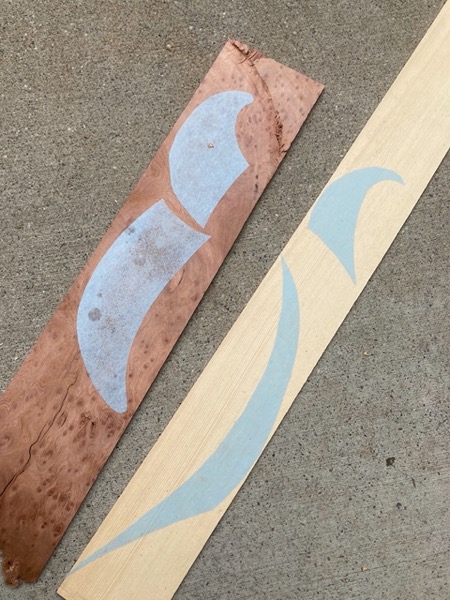
I rough-cut the pieces with a fine-blade coping saw, then used a bench sander for outside curves and small-drum sander in a drill press for inside curves to trim the shapes exactly to the edges.
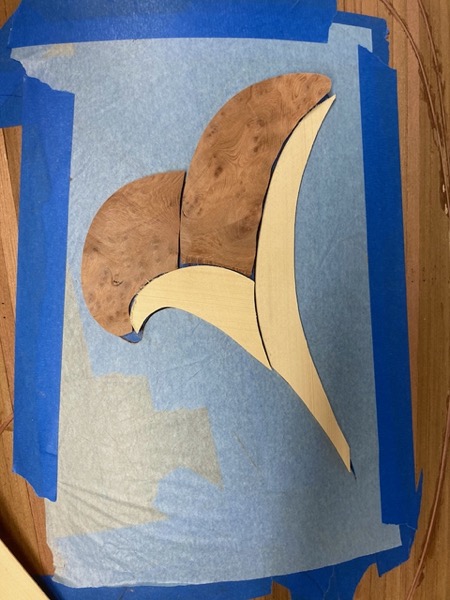
I'm not happy with this yet. It's not immediately obvious to Kristi that it's a 3D flower, yellow-cedar outside and burl inside. Fortunately my neighbors Pennie and Theresa are stained-glass artists and they have some good ideas about shading to better convey the idea.
At Pennie and Teresa's suggestion I've added 'shading' at the lips of the flower petals, as well as some differentiation between the petals inside and out. More sanding/shaping/trimming... Once I got something I liked, I stuck it all together and trimmed around it with a scalpel on the taped deck. Then I removed that cut tape, and routed out a 2mm deep hole for the inlay to sit in. This sounds easier than it was, and I cut the last half-mm or so on all edges with the scalpel.
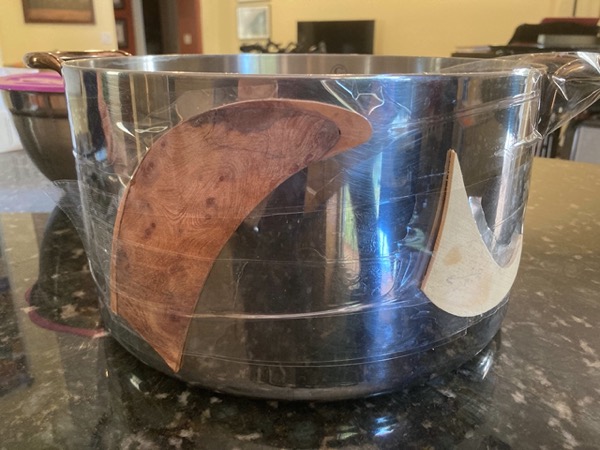
The deck is curved, and the inlay pieces are not. So I steamed the parts and then wrapped them around my biggest pot to get them curved the right way.
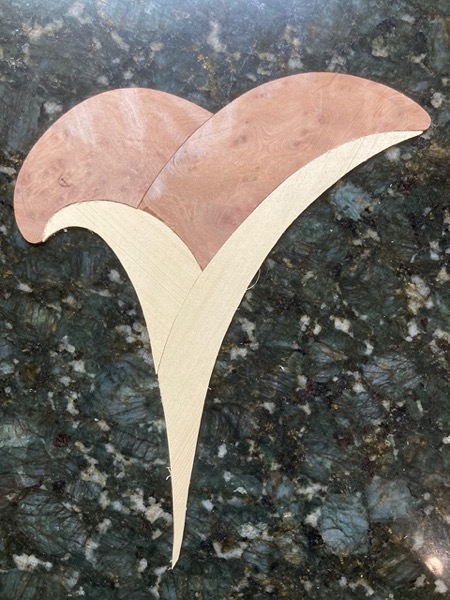
The two 'petal innards' went in first, then I cut the groove for the stamen, and worked from there. Each piece
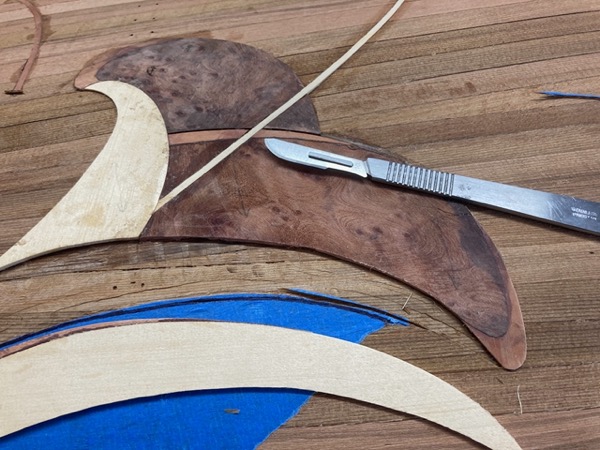
The last piece, closest to the stem, isn't glued here yet -- just trying to ensure that everything fits. I put the stem in first, then trimmed both the stem and the last flower piece to match each other
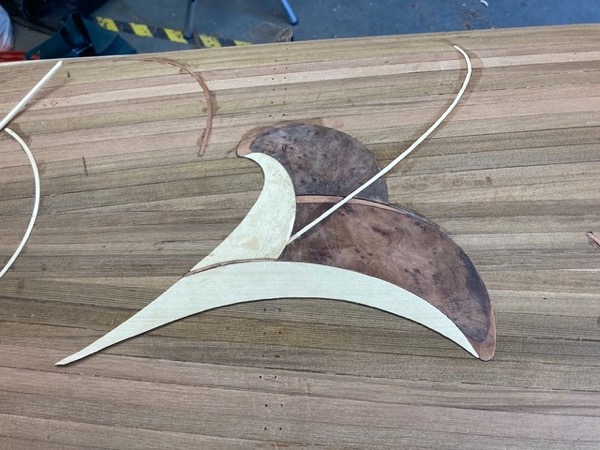
The last stem is actually 1/4" wide rather than multiple 1/8" bits. With steam, the yellow cedar can do this curve even if it's that thick. Redwood wouldn't be able to do it.
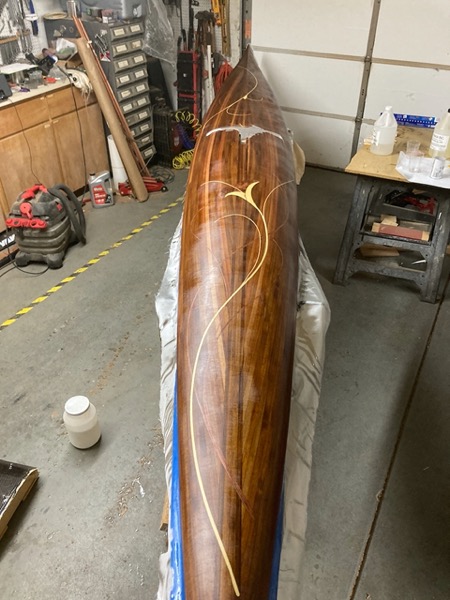
Now I need to sand all this inlay and deck down to the same level. I'm fairly certain that I have at least 1mm of inlay buried everywhere on the pattern. I hope that's enough; sanding through the pattern would be a disaster! Just for fun, I tracked the time I spent on inlay: 42 hours. That's not counting hours of doodling designs before I started cutting. This is not a way to build a kayak if you're in a hurry, that's for sure!
Fiberglassing the deck went smoothly. Practice certainly helps!
"Measure twice, cut once," they say, but I measure this cut a lot more than just once! This time around I went straight to the upright-strip-segment method of building the rim rather than messing about with plywood. It just works better, really. I use hot glue to tack every third or fourth upright in place while the titebond is drying. Then fillet/glass the outside with sawdust-filled epoxy and a bias-cut piece of 4oz glass, and cut to height.
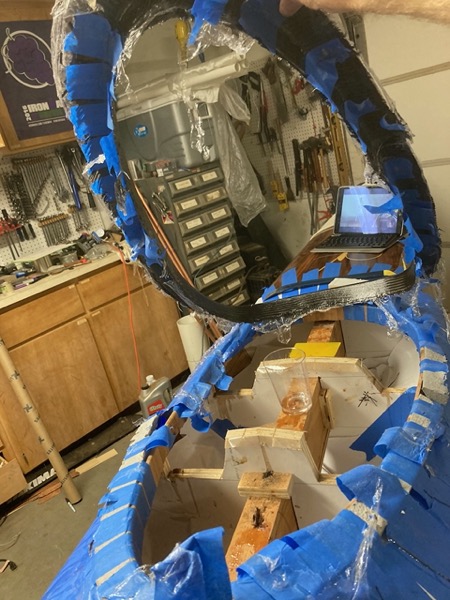
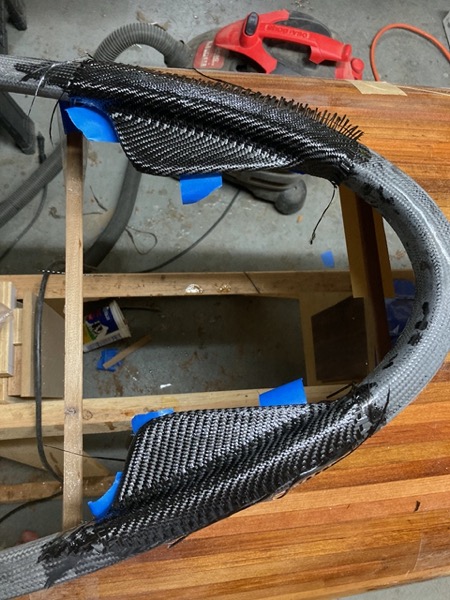
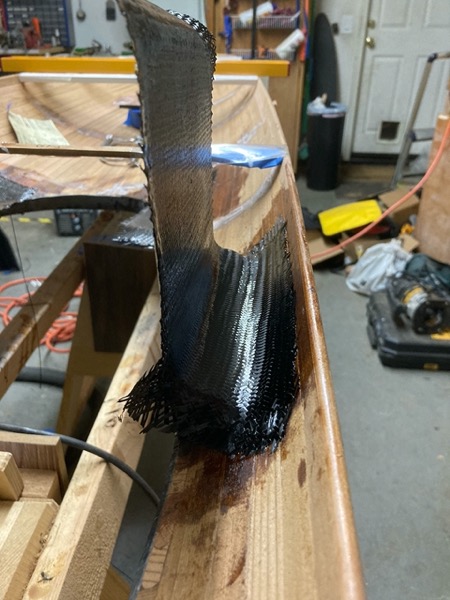
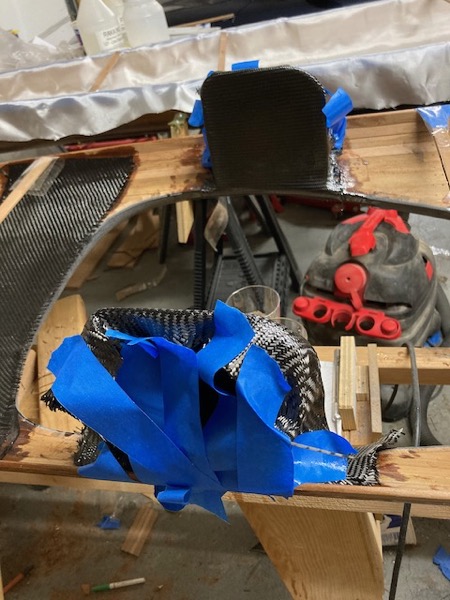
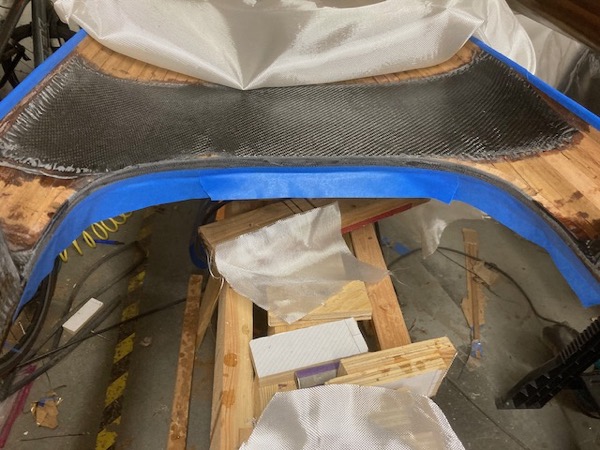
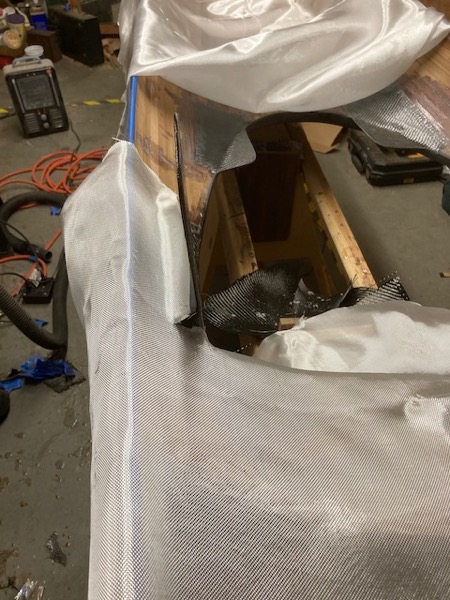
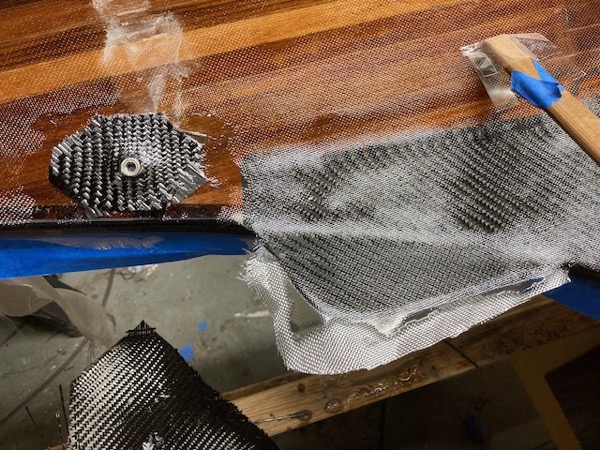
Actually making the carbon-fiber cockpit rim always seems like a big messy disaster. Mask things well, make a good foam/tape mold, hope for the best.
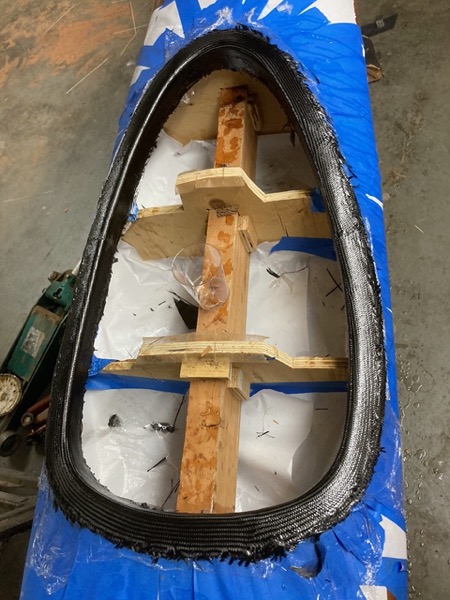
It looks horrible taking it out, and taking it out requires a prybar which is scary. Wear gloves -- the edges of this CF are sharp, and CF splinters are as painful as cactus spins but are not biodegradable so they stay in your hands longer. Once cut to size and wet-sanded smooth, glue it in with thickened epoxy. Remember to put a thin fillet of thickened epoxy underneath, at the top of the risers. This gets messy, just use your fingers and clean it up once the fillet is in place.
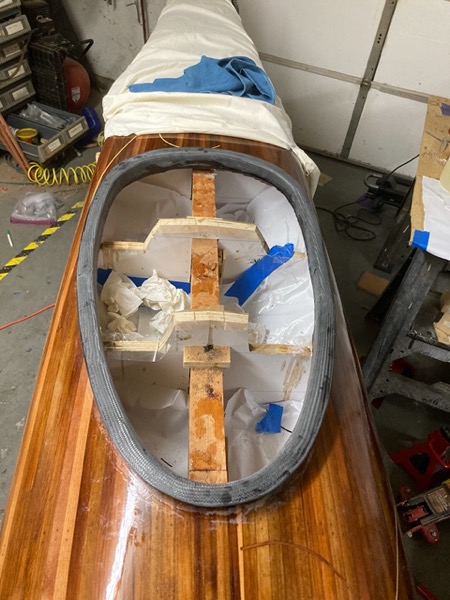
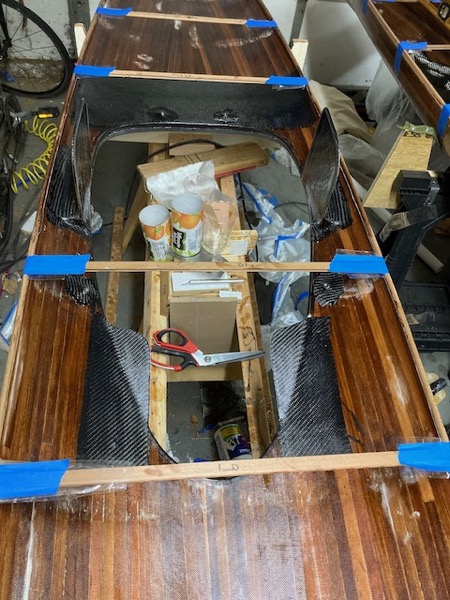
Sanded carbon is ugly, but it'll polish up nicely with 400-grit wet-sanding and varnish later. Incidentally, that CF rim is the strongest part of the entire kayak, the part to which the paddler attaches most, and it weighs 0.75lbs. By the time I trim the bottom off it'll weigh about half a pound at most. I like CF.
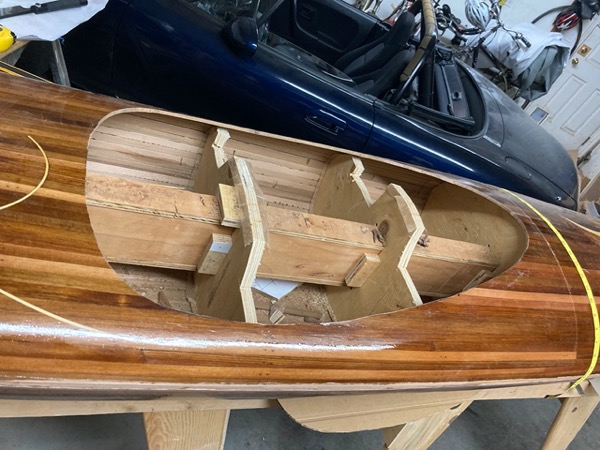
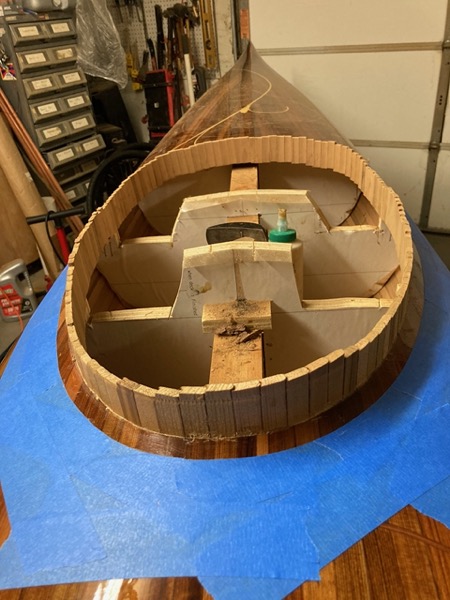
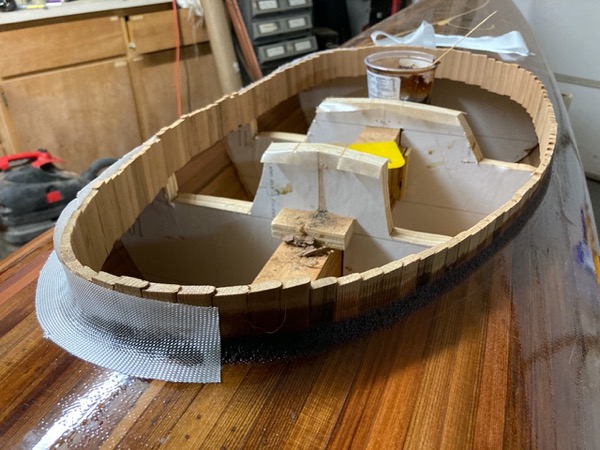
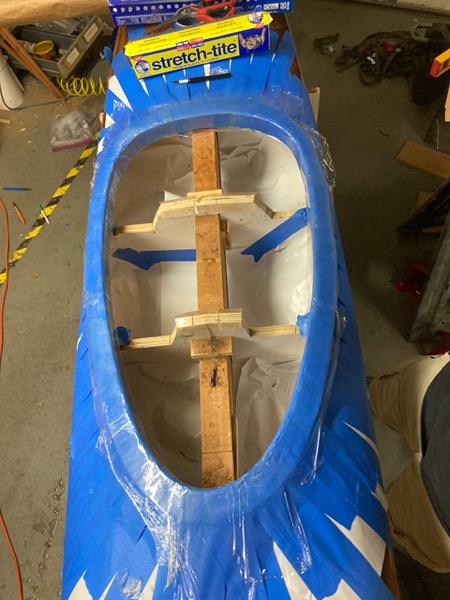
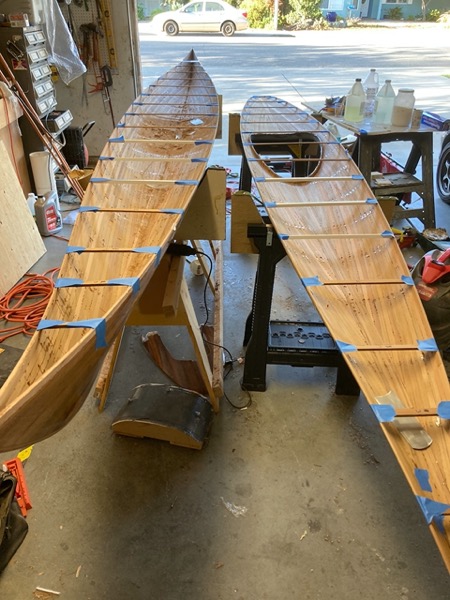
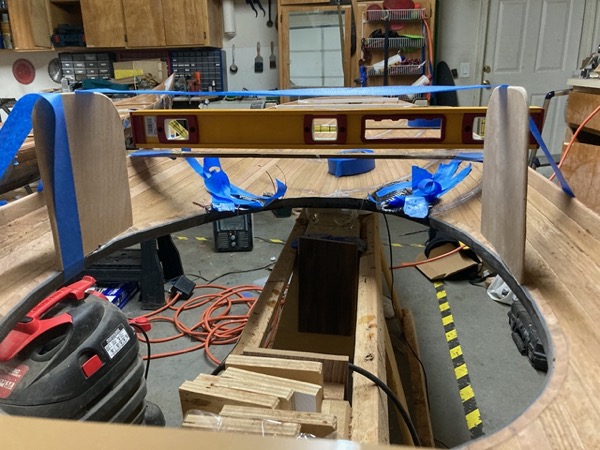
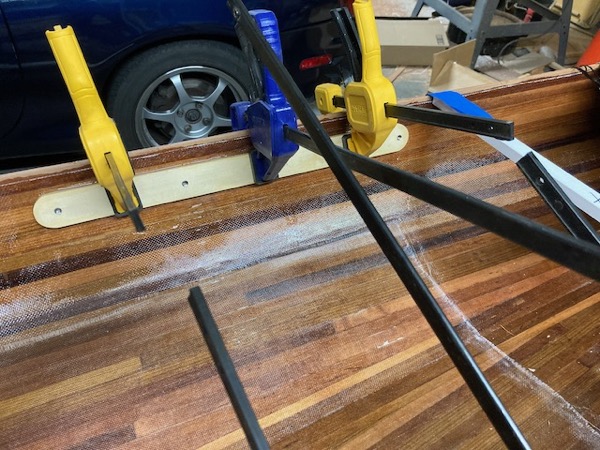
It's finally time to get rid of the form! One of the most important things at this point is to make sure that the two halves of the kayak still fit together when you finish working on them individually.. See my frustration on kayak #1 if you're curious how bad a problem this can be! My way of dealing with this this iteration was to cut braces that are the width of the form stations and keep those in place throughout all these next steps.
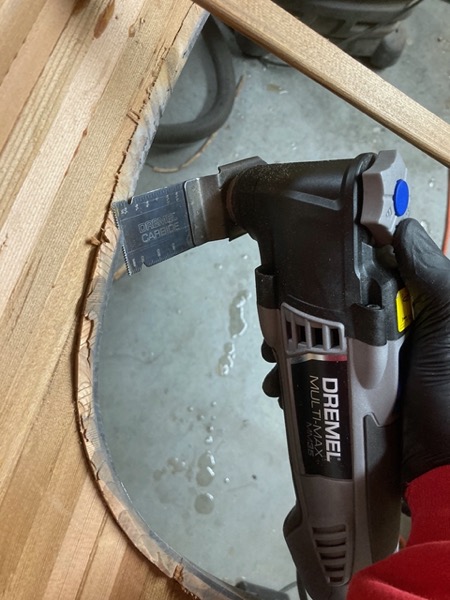
To cut off the excess cockpit rim material under the deck, this reciprocating saw worked extremely well. In retrospect, I think I should have bought a different model besides the Dremel: Dremel blades and attachments fit any other saw, but the other saw blades don't fit Dremel so I'm kind of locked in. But it hasn't been a problem, really... Cutting carbon is still a problem: cutting the bottom of this rim destroyed three carbide blades.
Cleaning up the inside is one of the slow parts of the build. I used curved scrapers: here you can see scraped (starboard) and unscraped (port) innards. This leaves the occasional pit or larger staple-hole to be filled, of course. If this were a canoe, I'd fill all those defects with color-matched putty, but given that this is the inside of a kayak and I'm not even filling the fiberglass weave, I just hit the larger gaps with filled epoxy so that there's a smooth surface for the glass. Any bubbles under that glass will be weak points in the resulting 'lignin-core fiberglass-composite structure'.
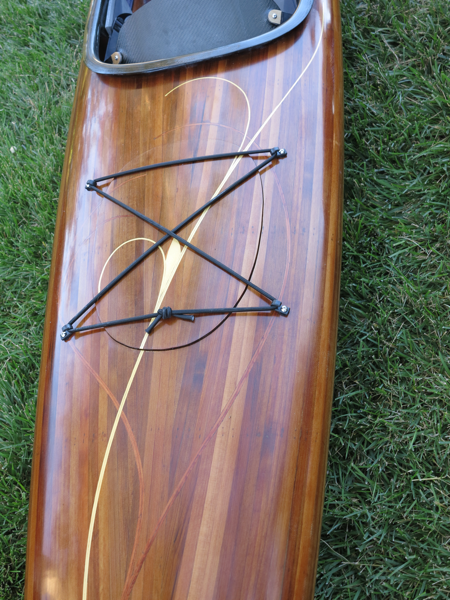
I prefer 'keyhole' cockpit shape to a straight oval shape. With a straight oval my knees are right on the oval edge. So I put these little 'wings' on the inside of the cockpit edge. They're just 1/8" (3.1mm) aircraft plywood, but then I fillet with filled epoxy and cover both sides with CF, so they are plenty strong. Once the epoxy cures I just blend that carbon in with the rest of the cockpit rim.
Same material for the hip braces. Here I am tack-gluing the braces in place with Titebond.
Those braces will be covered in CF both sides, but this is an area where strength is a good thing and that joint is not sufficiently strong. I fillet both sides with filled epoxy and then CF over the fillets. The outboard fillets are important, since there's a lot of compressive load on that area when rolling or bracing. On the first kayak I just made a big filled-epoxy fillet, but for this one I chose smart over bulky. That tube is a model rocket body tube (Estes rockets, remember those?) that I sprayed black krylon on the inside for some degree of water-resistance. The tube allows a functionally much larger fillet with lower weight. The tube is not really waterproof, but everything around it is even if it soaks out. It is there to hold the epoxy in place while it cures, and itself provides no strength.
Here the CF is wrapped onto the the outboard face of the hip-plate. It wraps around the ends of the tube also, which gives me hope that I can make this one solid-looking (and water-sealed) chunk instead of having the tube showing.
Inboard face of the hip-platess are a bit trickier, since I wanted them rounded. Here I'm using scads of tape to hold epoxy-soaked CF back so it wraps around the hipbrace core. Once it cures I just trim off the excess and it looks great.
Time to glass the insides now. 6oz glass on the hull with a 4oz abrasion patch where feet go, 4oz glass on the deck. The deck had to be done in two parts to get around the hip-plates.
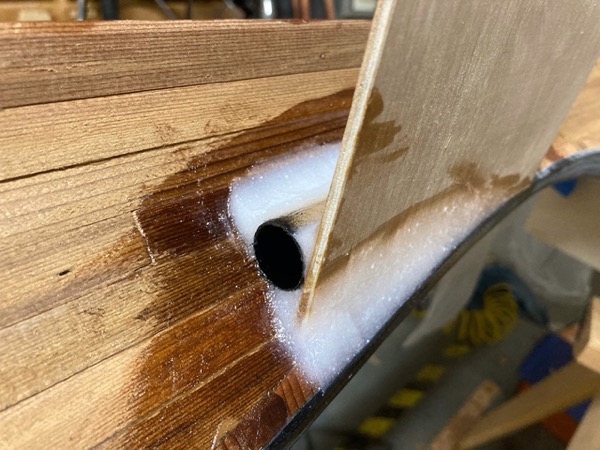
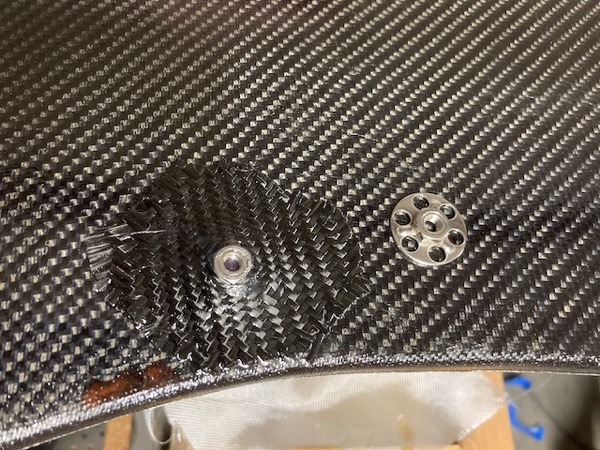
The one failure mode (only failure mode!) for kayak #1 was these inserts. On #1 I just glued these where I wanted to attach screw-in hardware, then attached the hardware with short M5x0.8 SS screws. Good idea overall, but the inserts popped off at high-stress points like the 'pull-the-seatback-forward' straps so I've been having to re-attach them more securely. This time I decided to do it right the first time, before the inside of the hull was difficult to reach. I just applied CF over the flange portion of the insert and I don't think they'll be going anywhere. I put a waxed screw in the insert during the process to make sure I didn't seal off the threads!
for the footbraces, I bought adjustable braces from Amazon again. They worked fine on the first kayak after all. Again, I made a yellow cedar mount, inserted t-nuts where the footbrace had screw-holes, and glued them to the sides of the boat in what I hope were the right spots using thickened epoxy. Once set, I coated them with more epoxy to waterproof them. Again, waxed M5x08 screws kept the threads clean during the gluing process.
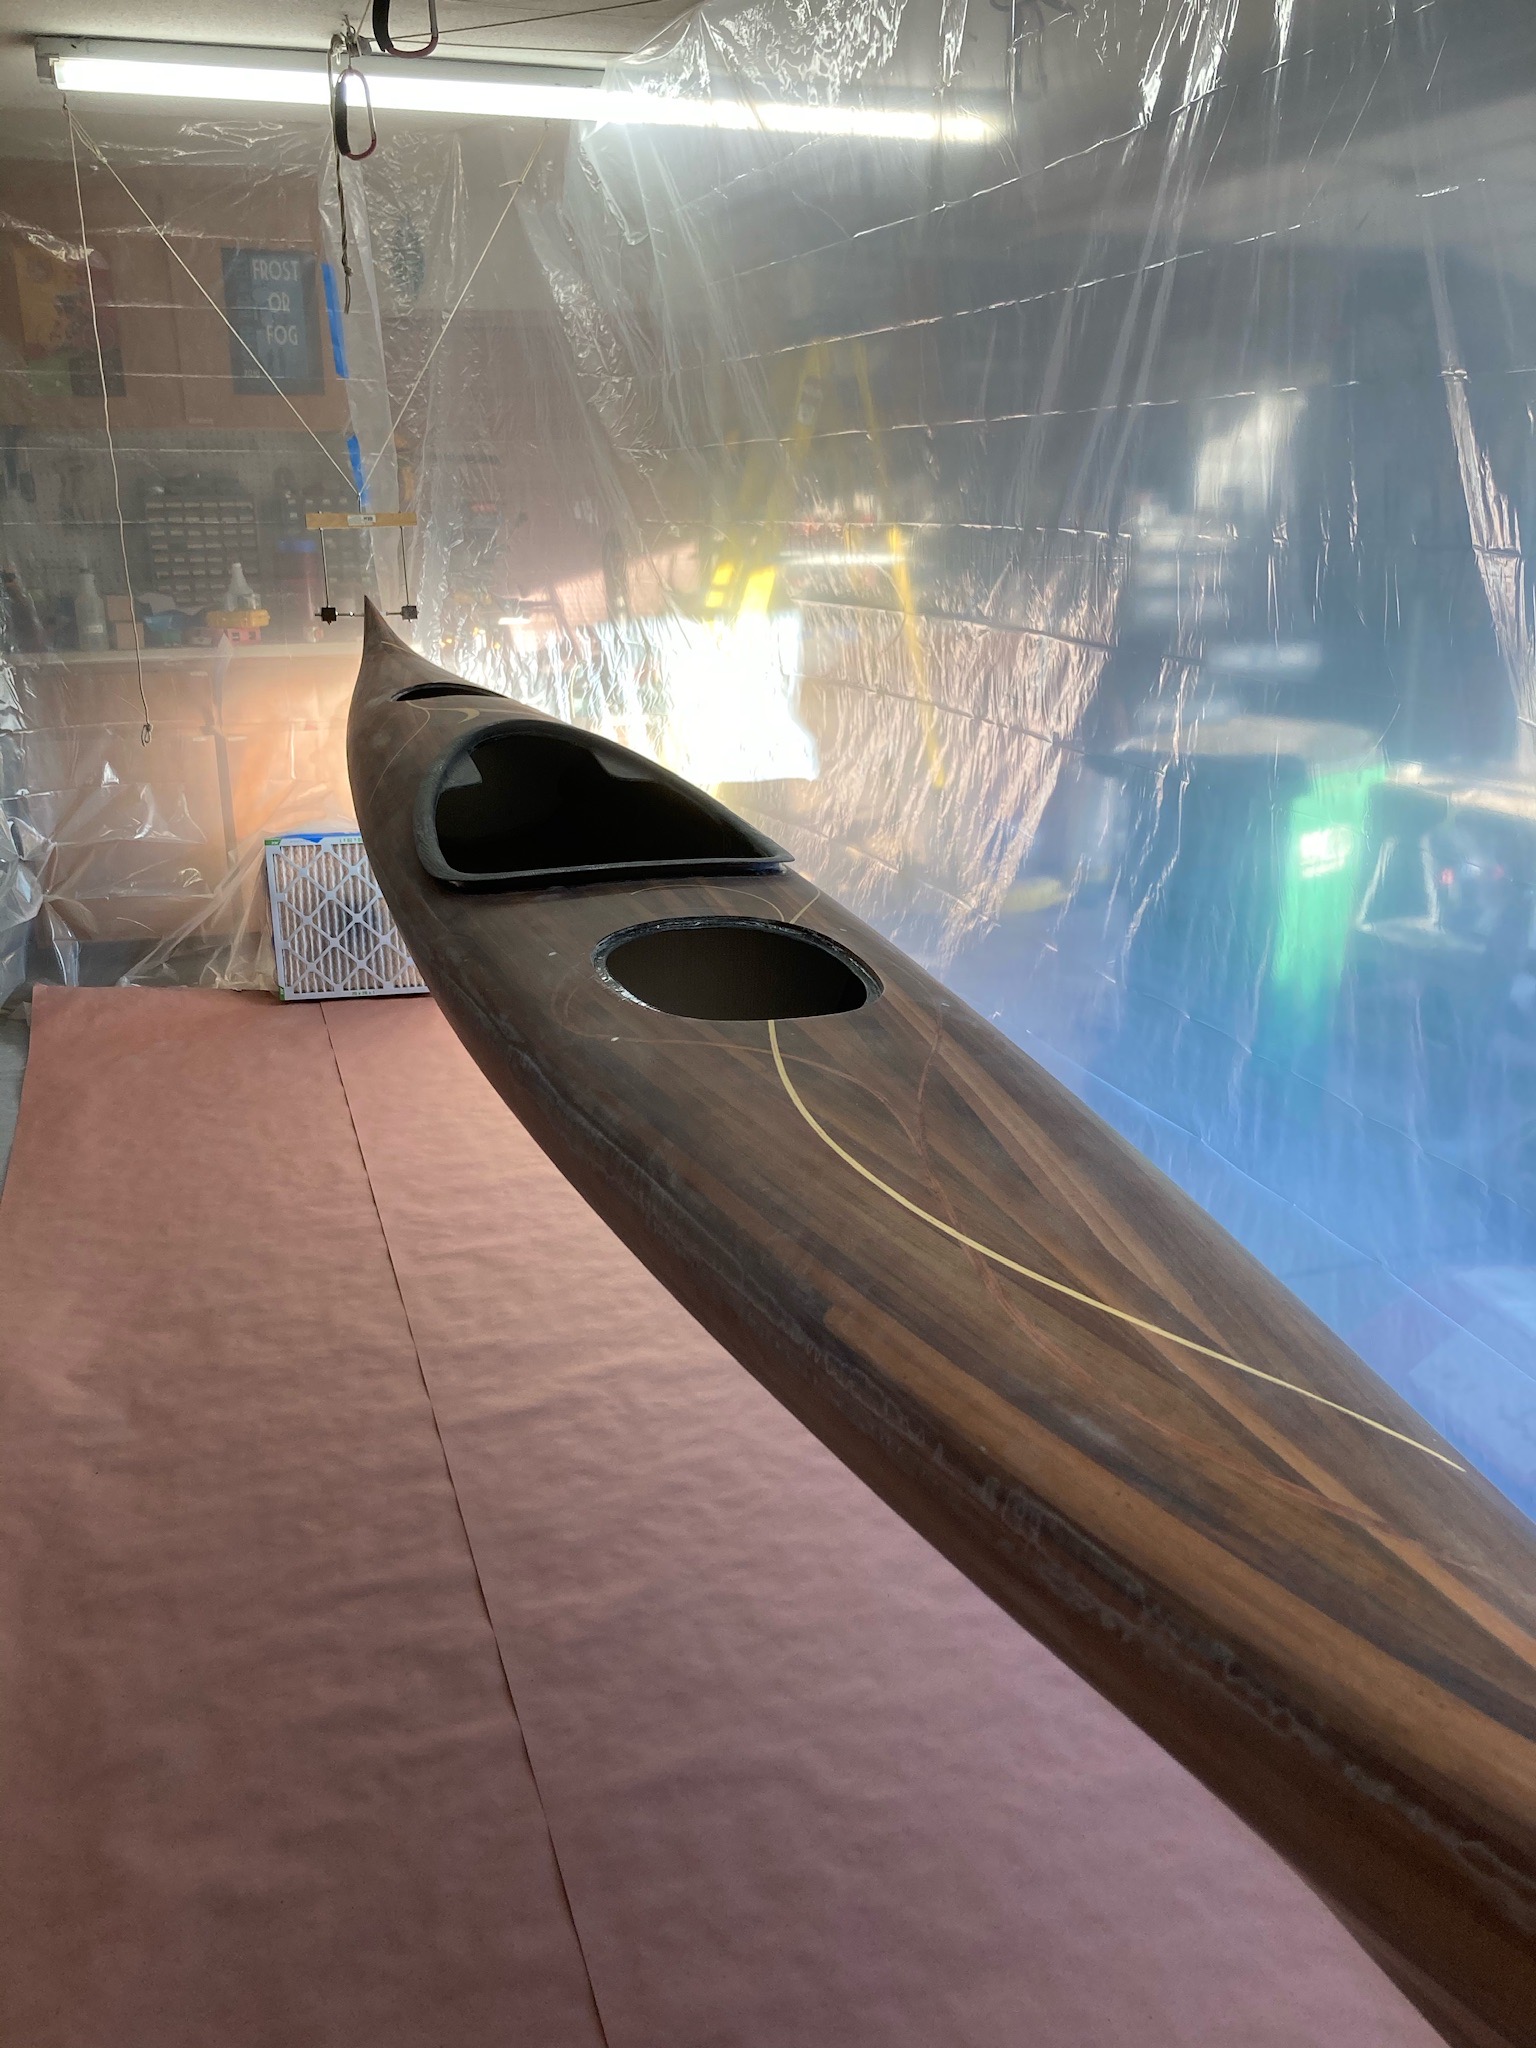
Cutting the hatches and making the hatch lips was the same process as kayak #1; I didn't take pictures. This time it went a lot more smoothly since I'd been keeping cross-braces in both halves at all times so there was no warping of the deck, and no hatch braces were needed.
Another thing I did differently here was to use t-nuts for deck hardware rather than drilling holes later and using bolts/nuts. I installed the T-nuts from the inside of the deck, of course. I buttered the flanges with thickened epoxy and used a screw and a washer on the outside to pull the nut into the hole, then wiped the epoxy smooth on the inside. It looks slick: from the outside there's just a hole with a thin ring of stainless steel thread visible, flush with the deck.
Incidentally, as with kayak #1 all hardware is stainless steel, M5x08 thread, 3mm allen button-head. One allen wrench will adjust everything on this kayak, and unlike kayak #1 no 8mm wrench will be needed since there are no nuts. I may go retrofit #1 with t-nuts for deck hardware later.
With hatches done, it's finally time to make the kayak one piece! Titebond to glue the deck to the hull along the sheerline, lots of straps to clamp everything tight. Went smoothly! It helps to get a couple friends involved on this one because the titebond sets quickly and the straps are fiddly.

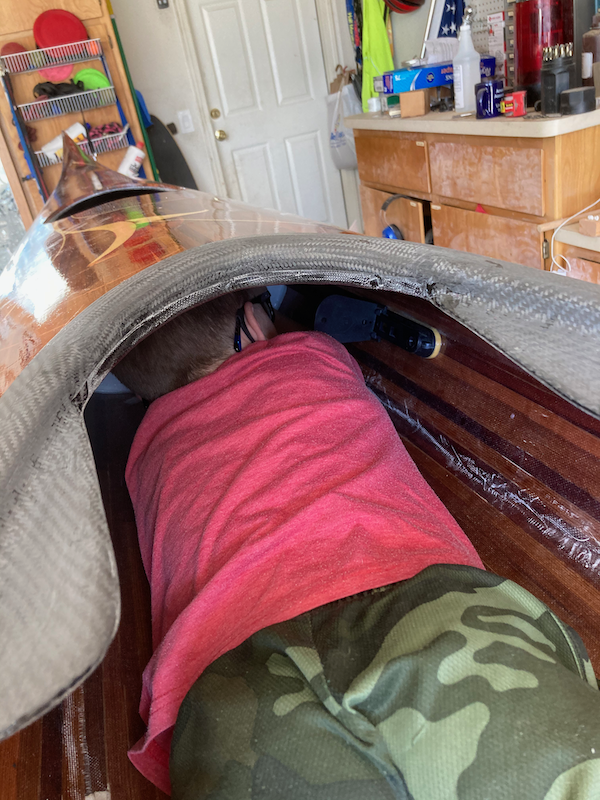
At this point it looks so close to done that you can almost taste it, but there's a lot still to be done. Fiberglassing the inside of the deck/hull seam is always a fun time, and if you're lucky you won't glue your head to the inside of the kayak. I was lucky, but not so lucky that I took pictures of the process. Working on the inside bow of the boat through the forward hatch is ... challenging. The outside seam is much easier; here it is masked and taped/epoxied. I used 2" wide 6oz e-glass fiberglass ribbon for the seam, then used scrapers to feather the edges and blend it in to the hull.
I use adjustable footpegs: now that the kayak is one piece it's time to attach them. They just screw into the t-nuts on the mount-points installed earlier, but I don't fit into the kayak well enough to reach them. That's what neighborhood kids are for.
Next: finish sanding then it's time to varnish it. As with the first kayak, I hung this one in the garage by the end-holes, then built a spray-tent around it. The end of the spray tent nearest the garage door is left open, and the far (innermost) end is fitted with a box fan and filter so that there is positive clean-air pressure inside the tent. Filtered air comes in, after that air (and dust) only go out. I also masked off the openings and plugged the T-nut holes with waxed screws.

The varnish I'm using recommends 18 hours between coats. While that's curing, I built a seat from minicell foam.
Seven coats of varnish later... I
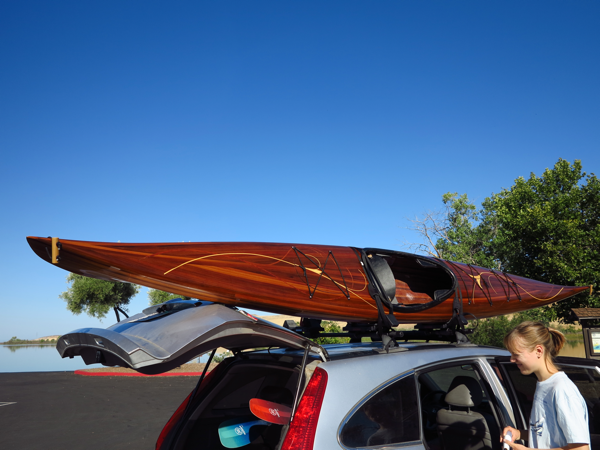
P.S. It would be reasonable to ask why I decided to make this one a slightly smaller kayak. Two reasons: One is that it is ostensibly for my daughter, who is of a more petite build than myself. The other is that I have to store it in the garage...